Physical Address
304 North Cardinal St.
Dorchester Center, MA 02124
Physical Address
304 North Cardinal St.
Dorchester Center, MA 02124

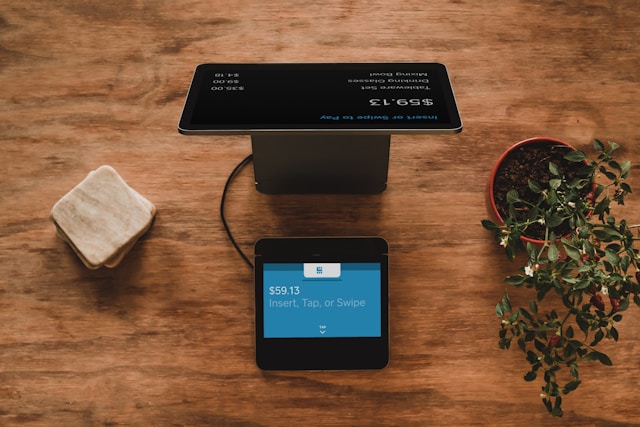
Modern technology affects all aspects of life, but it especially redefines financial…

Seventy years ago, the U.S. Supreme Court declared in Brown v. Board…

Arkadiy Mutavchi is an economist who founded and managed several enterprises and…
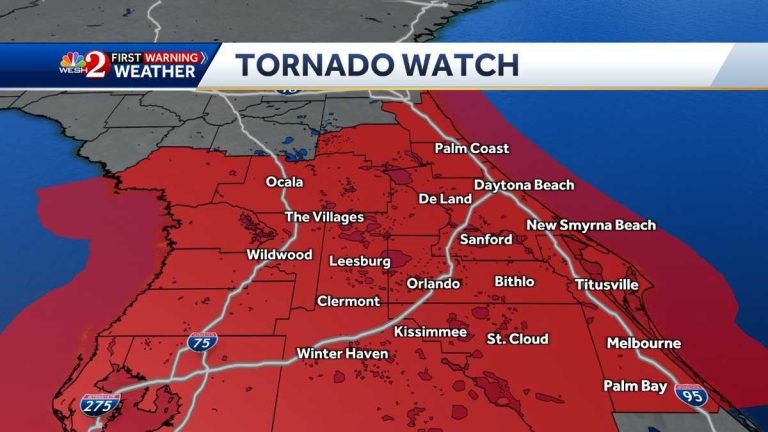
A tornado watch has been issued for several counties in Central Florida…

Months after a bridge collapse in Baltimore, a cargo ship remains trapped.…

An Air Force instructor pilot, Capt. John Robertson, died after the ejection…

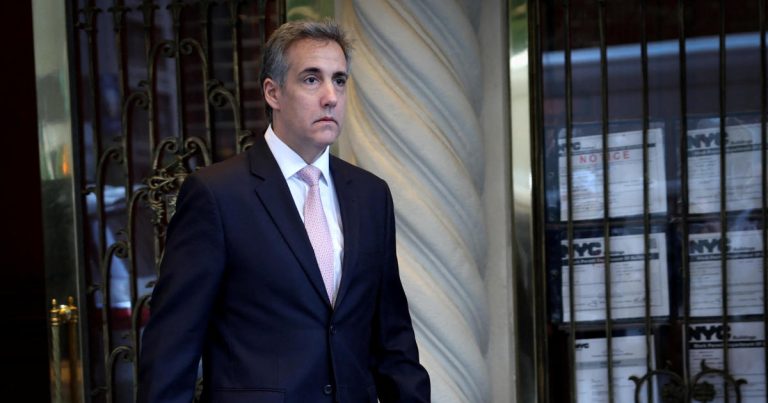
Former President Donald Trump’s legal team worked to discredit Michael Cohen, the…
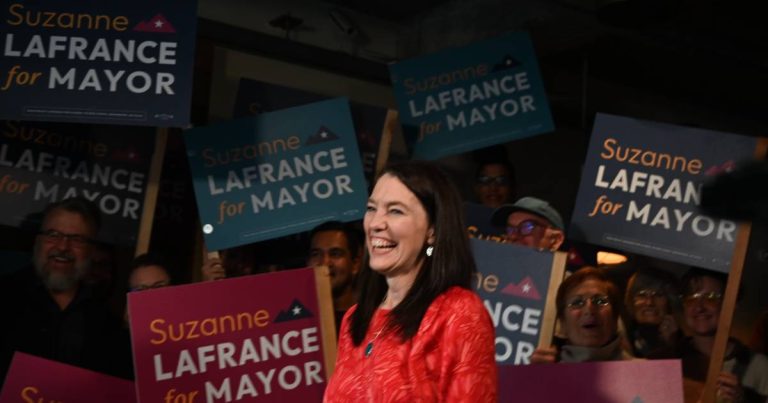
Anchorage mayoral candidate Suzanne LaFrance had an initial strong lead over current…
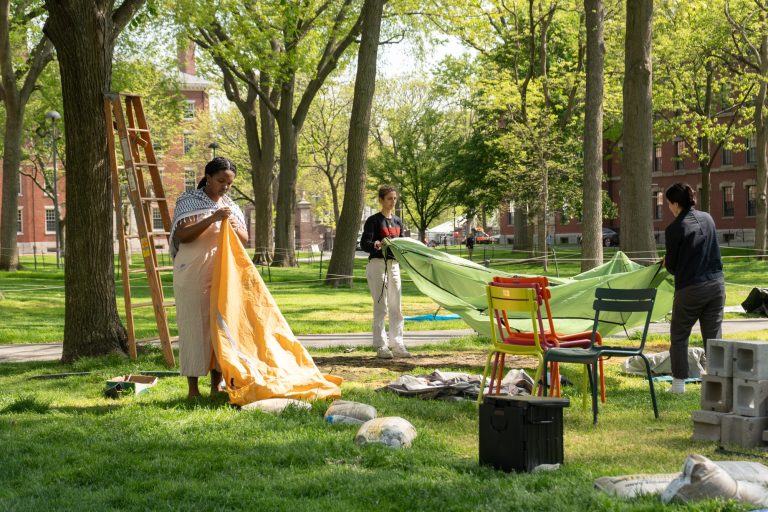
The Faculty of Arts and Sciences Dean Hopi E. Hoekstra praised interim…

Cohen has admitted to committing federal crimes such as lying to Congress.…

All of Baltimore’s leadership positions were up for election in 2024, including…

A Chicago activist and Dolton trustee known for supporting grieving families at…

The expected vote is the estimated total number of votes in a…

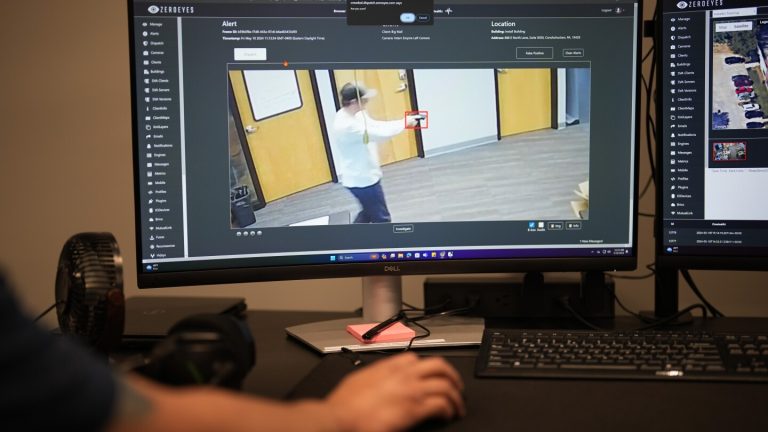
A security guard trainee at an Amazon warehouse in Ohio was fatally…

A security guard trainee at an Amazon warehouse in Ohio was fatally…

Eight TikTok creators filed a lawsuit against the U.S. government, challenging a…

Sarah Beth Clendaniel pleaded guilty to federal conspiracy and firearms charges. Clendaniel,…

After a decade of loyalty, Michael Cohen decided to turn on Donald…
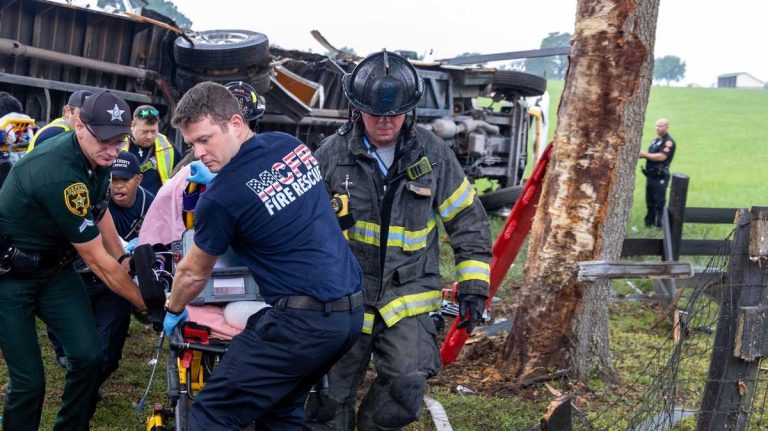
A tragic crash on SR-40 in Ocala involving a bus resulted in…

Blanche interviewed Cohen who mentioned following the trial closely through TikTok, CNN,…

Kansas City, Kan., is experiencing some of the worst air quality in…
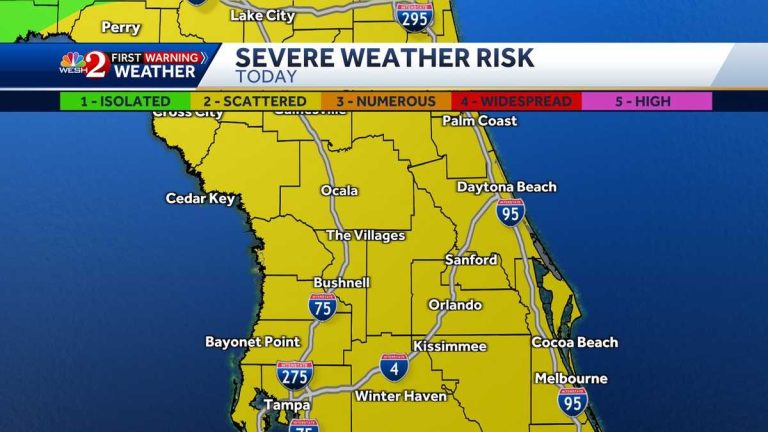
Strong storms with wind gusts and hail are moving from the panhandle…

Voters are casting their ballots in four states on Tuesday for primaries…

Michael Cohen testifies that he misled the FEC about the $130,000 payment…

Michael Cohen, former personal attorney to Donald Trump, testified for the second…

The body of missing hiker William Donovan, 65, from Cambridge, Massachusetts, was…

Donald Trump is facing a trial involving hush money, but a judge’s…

US President Joe Biden recently forced a Chinese-backed cryptocurrency mining company called…

A 26-year-old man has been arrested for the stabbing death of a…

In a highly anticipated congressional race, U.S. Rep. Don Bacon of Nebraska…

Michael Cohen has admitted to committing federal crimes, specifically lying to Congress.…
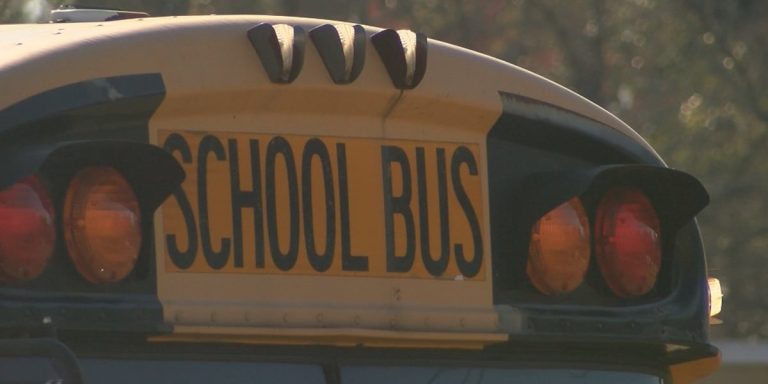
Several schools in the Baton Rouge area have announced closures on Tuesday,…

Father Leo Riley, accused of sexually abusing boys in the 1980s, appeared…

A former Marine from New Jersey, Joshua Cobb, was arrested for threatening…

The Pasadena Police Department released a video of a single-vehicle crash that…

Crews used explosives to remove the Key Bridge truss from the Dali…

The Arizona Supreme Court granted a request to delay the enforcement of…
Vice President Kamala Harris used profanity while giving advice to young Asian…

The collapsed Francis Scott Key Bridge in Baltimore was deliberately destroyed, allowing…

A planned demolition was conducted on the collapsed Francis Scott Key Bridge…

The Wisconsin Supreme Court, led by liberals, hinted at their willingness to…

Sarah Virginia Brennan experienced the mispronunciation of her first name for the…

Former President Donald Trump is at risk of facing jail time if…
The South is experiencing another round of storms, with heavy rain causing…

Hazy conditions due to smoke from wildfires in western Canada triggered air…
In the summer of 2016, Karen McDougal, a former Playboy model, attempted…

A storm system will bring severe weather and flooding to the South…
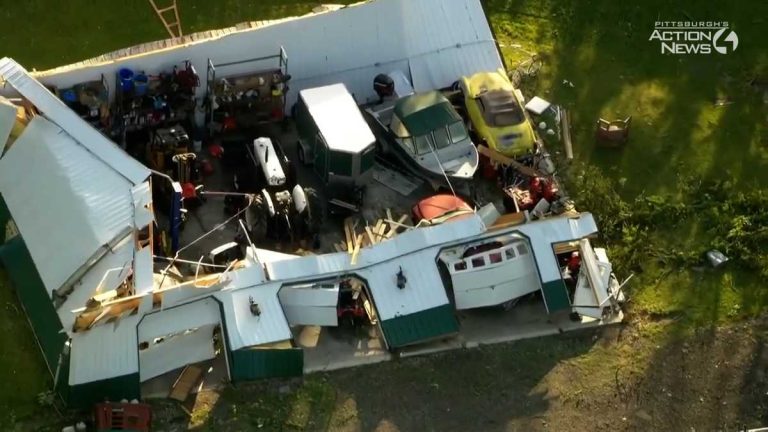
An EF2 tornado caused extensive damage in Washington County on Sunday, ripping…
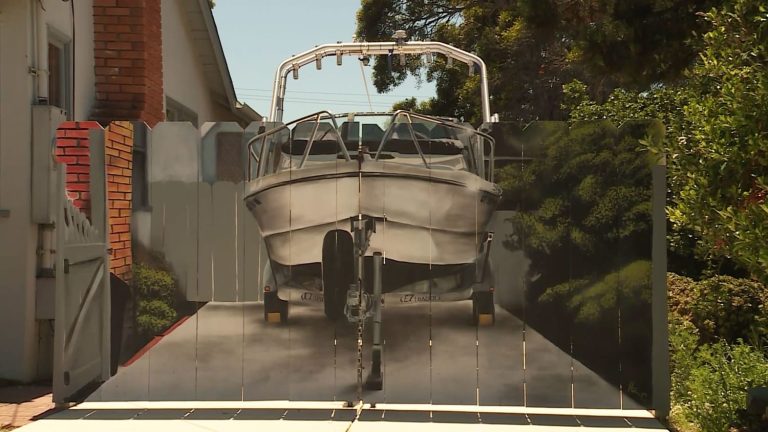
A California man was told to conceal his boat with a 6-foot…
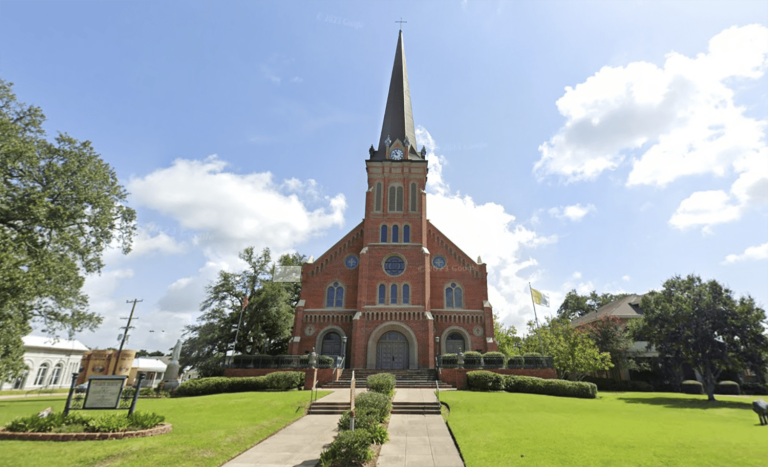
Churchgoers in Louisiana stopped a teenager with a rifle from entering a…
Today’s weather is rated at 9/10, so it’s a good day to…

The Israeli military intensified attacks on northern Gaza on Monday, renewing questions…

Dozens of students at Duke University walked out on Jerry Seinfeld’s commencement…

The star prosecution witness in Donald Trump’s hush money trial, Michael Cohen,…

Seattle’s restaurant community is mourning the stabbing death of a 37-year-old chef…
Dozens of students walked out on Jerry Seinfeld at Duke University as…
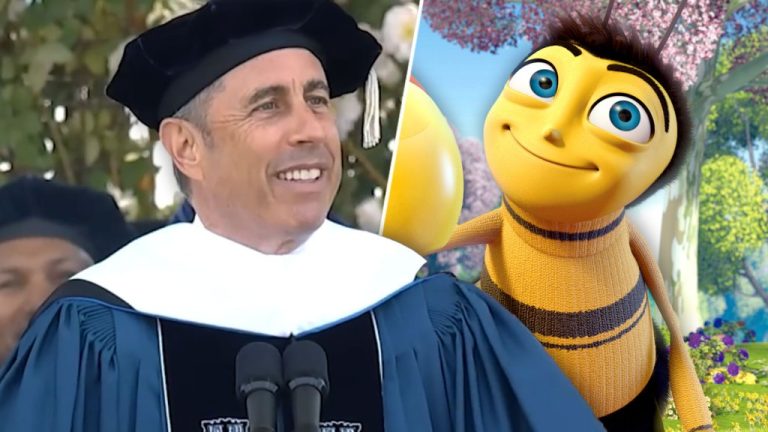
Jerry Seinfeld apologized for the “sexual undertones” in his Bee Movie during…

Florida’s fish and wildlife commission is searching for a boater who fatally…

Over the weekend, North Carolina experienced a rare opportunity to see the…

A man from New Hampshire has been charged after knocking over a…

Richard “Rick” Slayman, the first person to receive a genetically modified pig…

The Exton Square Mall Spring Carnival was canceled after a crowd control…

A man suspected of firing multiple gunshots at an Amazon fulfillment center…
Kansas is considering grants of up to $5 million for schools to…

A tornado hit Finleyville, Washington County, causing destruction with trees down, homes…

Dozens of students at Duke University walked out of their commencement ceremony…

An Ohio police officer was shot and killed in Euclid after responding…
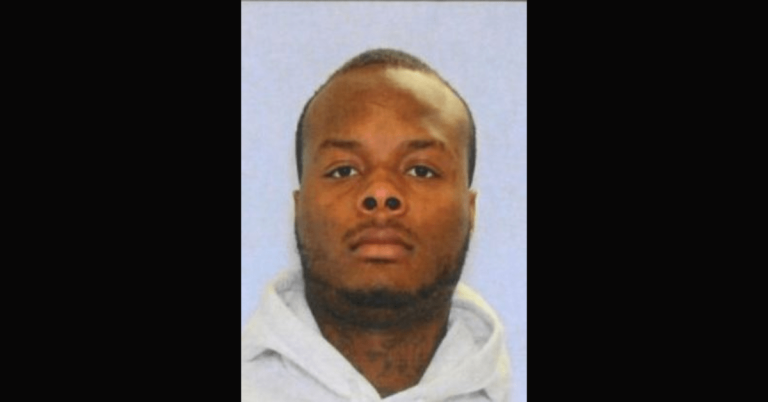
Euclid police have identified Deshawn Anthony Vaughn as the suspect in the…
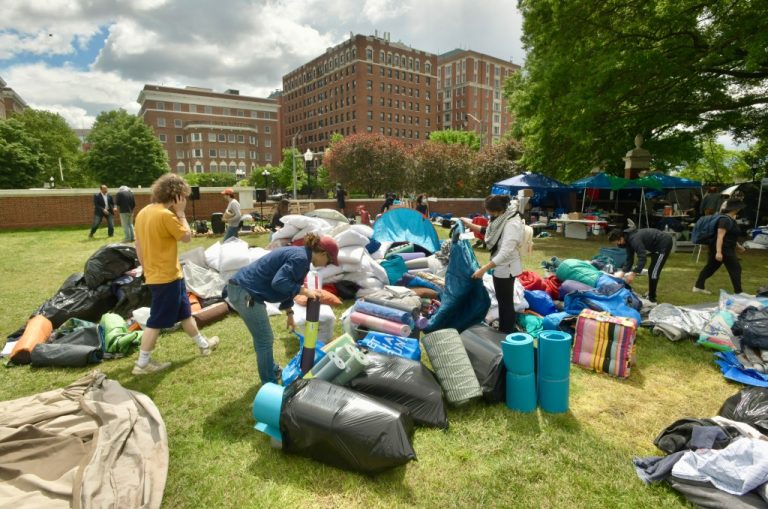
The Johns Hopkins University and pro-Palestinian protesters occupying an encampment on the…

West Virginia Republicans running in the primary are avoiding acknowledging that President…
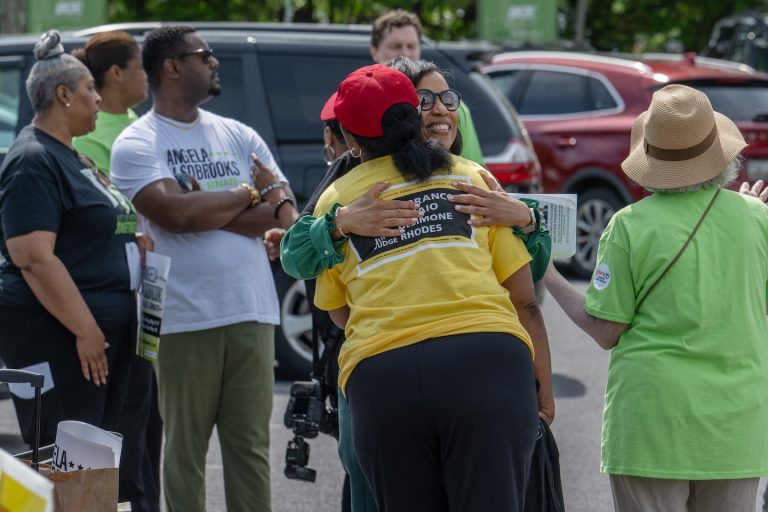
In the final hours of her U.S. Senate primary campaign, Angela Alsobrooks,…

Minouche Shafik, the president of Columbia University, was in Washington on April…
Michael Cohen, once a loyalist to Donald Trump, is now a key…

Crews are preparing to conduct a controlled demolition of the Francis Scott…

Three days after a 30-year-old mother, Brenda Duran, jumped into the San…

A mother in Georgia was fatally attacked by a pack of dogs…

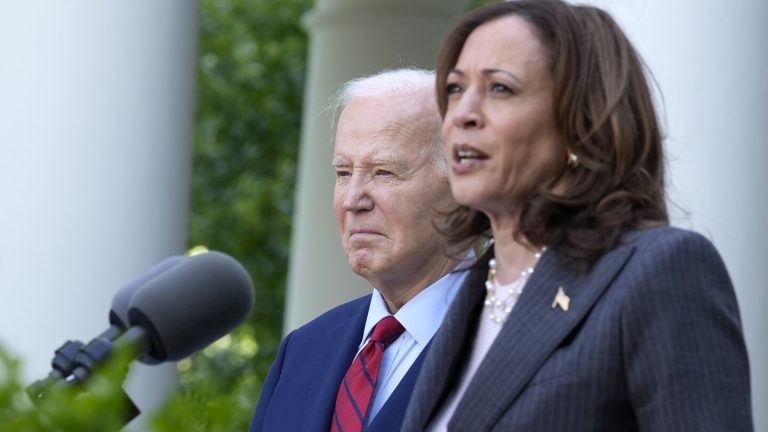
President Joe Biden attended a fundraiser in Medina, Washington with other politicians,…

Donald Trump insulted the prosecutor in his New York criminal trial at…
Nicki Myers-Bates lost her mother at a young age and has been…

Three people died and three others were injured when a Tesla crashed…

Former US president Donald Trump raised eyebrows at a rally in New…

North Dakota Gov. Doug Burgum spoke before a crowd of Donald Trump…
A man in New Hampshire is facing charges after knocking over a…

Former President Donald Trump visited Wildwood, New Jersey, for a campaign rally,…

Donald Trump went to the Jersey Shore in between court appearances and…
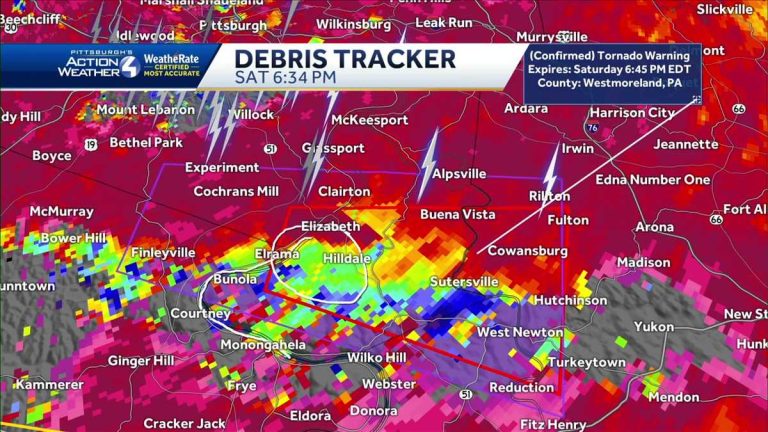
A tornado has been confirmed in southern Allegheny and northern Washington counties,…
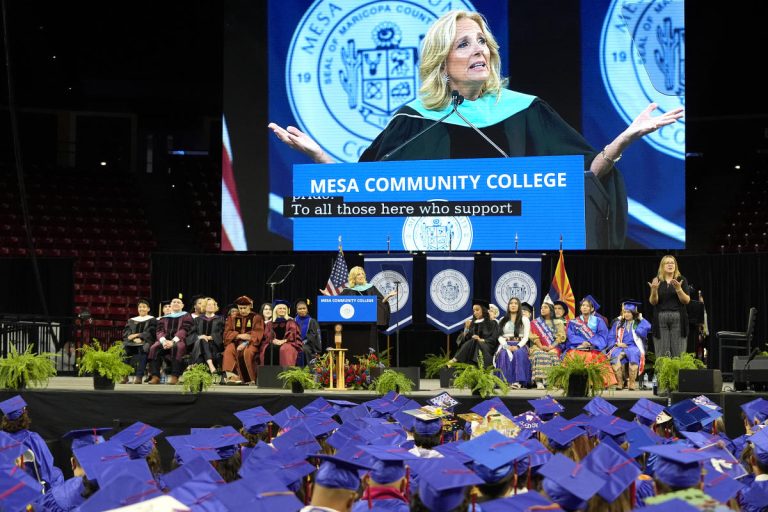
Jill Biden, the first lady, encouraged graduates of Mesa Community College in…

Judge Juan Merchan warned Michael Cohen to refrain from discussing the case…

Donald Trump, facing multiple felony charges, held a rally in Wildwood, NJ,…

Universities are preparing for commencement ceremonies this weekend amid pro-Palestinian protests and…